Costco Prime Rib Cooking Instructions: A Comprehensive Guide
Embark on a culinary journey with Costco’s stellar prime rib! This guide simplifies the process, offering insights into seasonings, cook times, and serving suggestions.
Discover how to roast the perfect prime rib, transforming a potentially daunting task into an achievable and delicious experience for your festive gatherings.
Understanding Costco Prime Rib Options
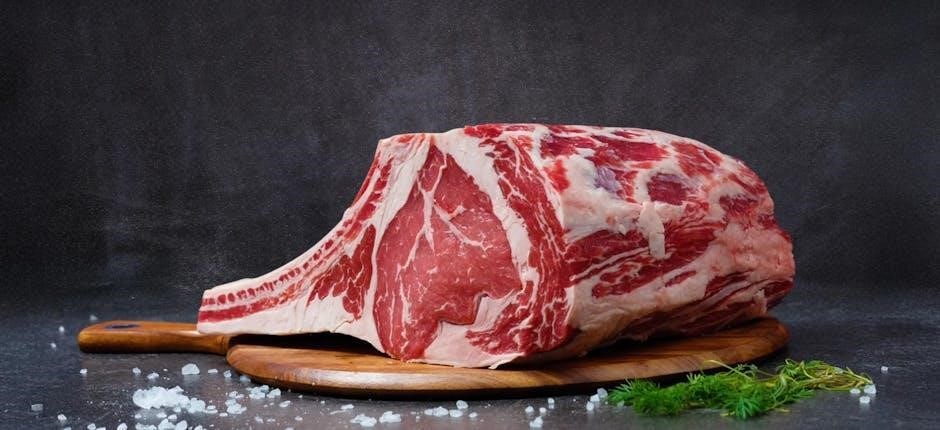
Navigating Costco’s prime rib selection begins with understanding the available choices. You’ll primarily encounter both Prime and Choice grades, alongside options for boneless or bone-in roasts. Costco frequently offers substantial cuts, often exceeding 10 pounds, catering to larger gatherings.
Prime rib, designated by abundant marbling, promises exceptional tenderness and flavor, representing the highest quality grade. Choice rib roasts, while still flavorful, possess slightly less marbling and may require a bit more attention during cooking to maintain moisture.
Bone-in roasts are favored by some for the enhanced flavor imparted by the bone during roasting, and they can also act as a natural insulator, promoting even cooking. Boneless roasts, conversely, are easier to carve and offer a more streamlined presentation.
Considering your guest count is crucial when selecting a size. A 17-pound roast, as reported by WineBerserkers members, is suitable for 13-17 adults plus children, while Rastelli’s offers options around 7 or 5 pounds, serving 8-10 people. Careful planning ensures everyone enjoys a generous portion!
Prime vs. Choice Rib Roast
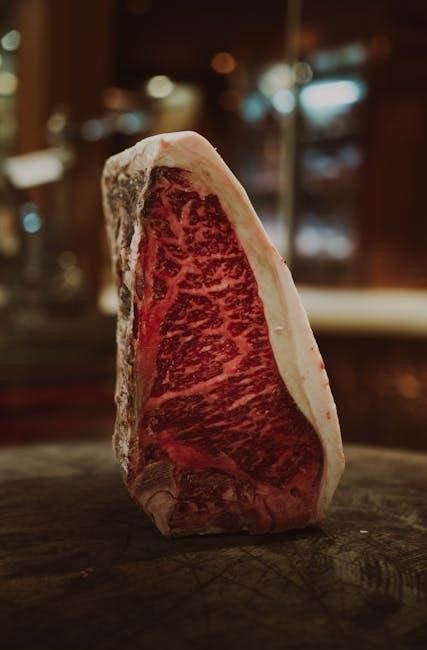
The fundamental distinction between Prime and Choice rib roasts lies in marbling – the intramuscular fat that contributes significantly to both flavor and tenderness. Prime grade, representing the top 2-3% of beef, boasts abundant marbling, resulting in a remarkably juicy and flavorful roast. This extensive fat content renders Prime roasts exceptionally forgiving during cooking, minimizing the risk of dryness.
Choice grade, while still high quality, contains less marbling than Prime. It delivers a robust beef flavor but requires more precise cooking techniques to achieve optimal tenderness. Careful monitoring of internal temperature and potentially employing methods like reverse searing are recommended to prevent a drier outcome.
Costco typically offers both grades, allowing consumers to balance quality with budget. While Prime commands a higher price point, the enhanced flavor and tenderness often justify the investment, particularly for special occasions. Choice roasts present a viable alternative, offering excellent value when prepared thoughtfully.
Ultimately, the “better” choice depends on your priorities and culinary expertise. If seeking a guaranteed tender and flavorful result with minimal effort, Prime is the preferred option. However, a skilled cook can produce a delicious roast with a Choice cut, maximizing its potential through careful preparation and cooking.
Boneless vs. Bone-In Rib Roast
The age-old debate: boneless versus bone-in rib roast. Both options offer exceptional flavor, but distinct characteristics influence cooking and presentation. Bone-in roasts are often favored for their perceived superior flavor, as the bone imparts a subtle richness during cooking. The bone also acts as a natural insulator, promoting more even cooking and potentially increasing moisture retention.
However, bone-in roasts require carving skills to navigate around the bone structure. Boneless roasts simplify carving significantly, making them a convenient choice for larger gatherings or less experienced cooks. While some argue that boneless roasts lack the depth of flavor found in bone-in cuts, this difference is often minimal, especially with high-quality Prime beef.
Costco frequently carries both varieties, catering to diverse preferences. Boneless roasts tend to cook slightly faster due to the absence of the bone’s insulating effect. Consider your carving confidence and desired presentation when making your selection.
Ultimately, the choice is largely a matter of personal preference. Both boneless and bone-in rib roasts deliver a spectacular dining experience when properly prepared and cooked to perfection.
Costco Prime Rib Roast Sizes & Servings
Costco typically offers prime rib roasts in varying sizes, catering to different party sizes. Commonly available weights range from approximately 7 to 17 pounds, though availability can fluctuate. Accurate portion planning is crucial to ensure you purchase the appropriate size for your needs.
As a general guideline, plan for approximately 1 pound of bone-in rib roast per two people, or ¾ pound of boneless rib roast per two people. This allows for generous servings and potential leftovers. A 7-pound roast comfortably serves 7-10 individuals, while a larger 17-pound roast can accommodate 17-25 guests.
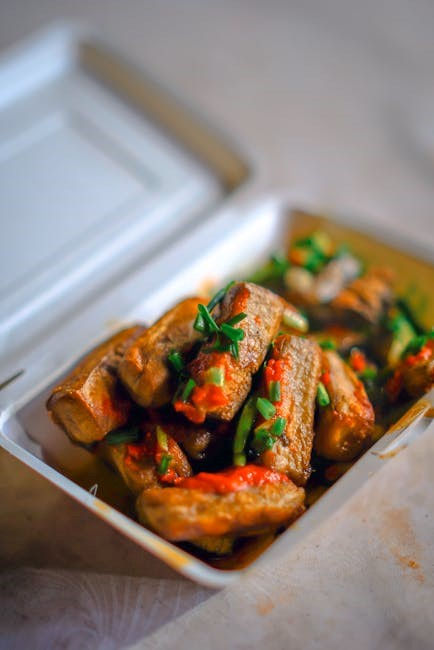
Considering the potential for a mix of adults and children, and varying appetites, it’s always prudent to slightly overestimate your needs. Epicurean Exploits suggests a 17lb roast for 13-17 adults and 6 children. Leftover prime rib is incredibly versatile – perfect for sandwiches, salads, or even a hearty breakfast hash!
Remember to factor in bone weight when estimating servings for bone-in roasts. Costco’s offerings provide a fantastic value, making it possible to enjoy a premium cut of beef without breaking the bank.
Preparing the Costco Prime Rib
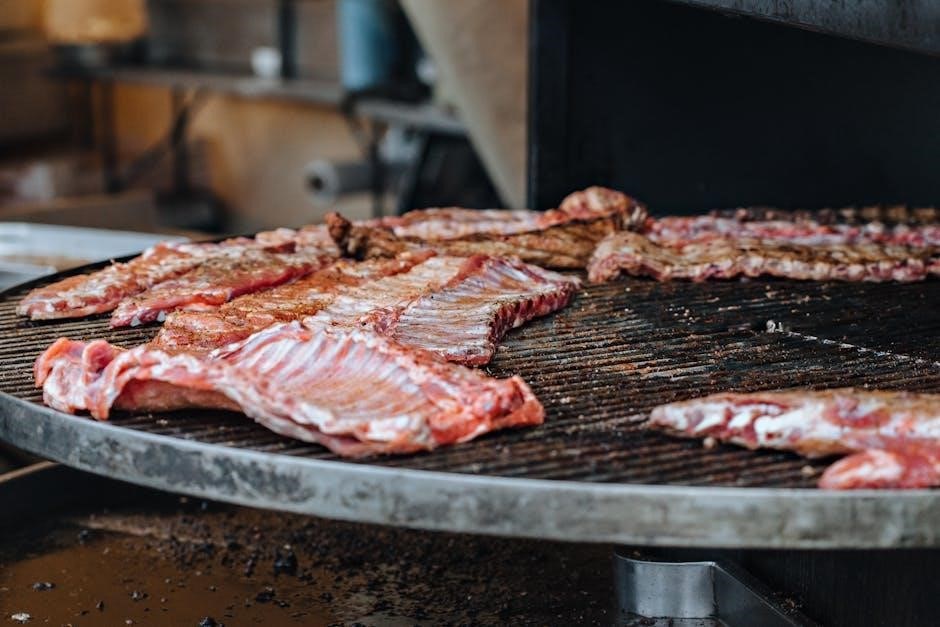
Begin by properly preparing your Costco prime rib for optimal cooking. This involves thawing, trimming excess fat, and generously seasoning the roast for maximum flavor infusion.
Thawing the Prime Rib
Proper thawing is crucial for even cooking and food safety when dealing with a large Costco prime rib roast. Given their substantial size – often exceeding 10 pounds – allow ample time for this process. The safest method is to thaw the roast in the refrigerator.
Estimate approximately 24 hours of thawing time for every 5 pounds of meat. Therefore, a 15-pound roast could require up to three full days in the refrigerator. Ensure the roast remains in its original packaging and is placed on a tray or in a container to catch any potential drips.
Avoid thawing at room temperature, as this can create a breeding ground for bacteria. While quicker methods like cold water immersion exist, they require diligent attention to maintain a safe temperature and frequent water changes. Refrigeration provides the most consistent and secure thawing experience, guaranteeing a delicious and safe prime rib dinner.
Confirm the roast is fully thawed before proceeding to the next preparation steps. You should be able to easily insert a thermometer into the thickest part of the meat without encountering significant resistance.
Trimming the Fat Cap
While a layer of fat is essential for flavor and moisture during roasting, excessively thick fat caps on Costco prime ribs can hinder seasoning penetration and prevent optimal browning. Trimming this cap strategically is therefore a vital preparation step.
Using a sharp knife, carefully trim the fat cap to approximately ¼ inch thickness. Avoid removing the fat entirely; leaving some fat allows for self-basting and contributes to a richer, more succulent roast. Focus on evening out the fat cap, removing any particularly thick or uneven areas.
Consider scoring the fat cap in a crosshatch pattern. This not only enhances the visual appeal but also aids in rendering the fat during cooking, resulting in a crispier exterior. Be cautious not to cut into the meat itself while scoring.
Remember, the goal isn’t complete fat removal, but rather refinement. A well-trimmed fat cap ensures a beautifully browned, flavorful, and tender prime rib, maximizing your Costco purchase’s potential.
Seasoning the Prime Rib
Seasoning a Costco prime rib generously is paramount to unlocking its full flavor potential. Don’t be shy – this large cut of meat can handle robust seasoning! Kosher salt and freshly ground black pepper are the foundational elements, applied liberally at least 24 hours, and ideally up to 48 hours, before cooking.
Beyond salt and pepper, consider incorporating garlic powder, onion powder, dried rosemary, and thyme. These herbs complement the beef’s natural richness beautifully. Some recipes suggest a touch of paprika for color and a subtle smoky note.
Ensure even coverage by rubbing the seasoning blend all over the prime rib, including the sides and any exposed meat. For deeper flavor penetration, create small pockets under the fat cap where seasoning can accumulate.
Allowing the seasoned prime rib to rest in the refrigerator for an extended period (dry brining) enhances both flavor and tenderness. This process allows the salt to draw out moisture, then reabsorb it, resulting in a juicier, more flavorful roast.
Rub Recipes for Costco Prime Rib
Elevate your Costco prime rib with a flavorful rub! A simple yet effective option combines 3 tablespoons kosher salt, 2 tablespoons black pepper, 1 tablespoon garlic powder, and 1 tablespoon onion powder. For a more complex profile, try a rosemary-garlic rub: mix 2 tablespoons chopped fresh rosemary, 4 cloves minced garlic, 1 tablespoon olive oil, 1 tablespoon Dijon mustard, salt, and pepper.
Another fantastic choice is a coffee-spice rub, featuring 2 tablespoons ground coffee, 1 tablespoon smoked paprika, 1 tablespoon brown sugar, 1 teaspoon chili powder, and a pinch of cayenne pepper. This adds a delightful depth and subtle heat.
For a classic herb crust, blend 1/4 cup chopped parsley, 1/4 cup chopped thyme, 2 tablespoons chopped rosemary, 4 cloves minced garlic, 2 tablespoons olive oil, salt, and pepper.
Regardless of the rub chosen, ensure thorough coverage of the prime rib. Press the rub firmly onto the surface, allowing the flavors to meld during the dry brining process. Experiment and adjust seasonings to your preference – the possibilities are endless!
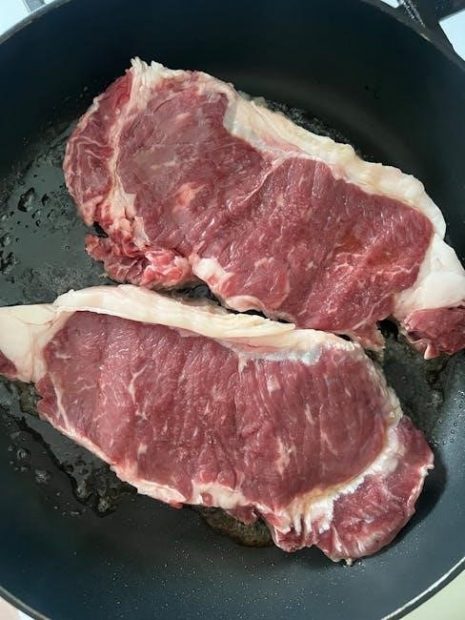
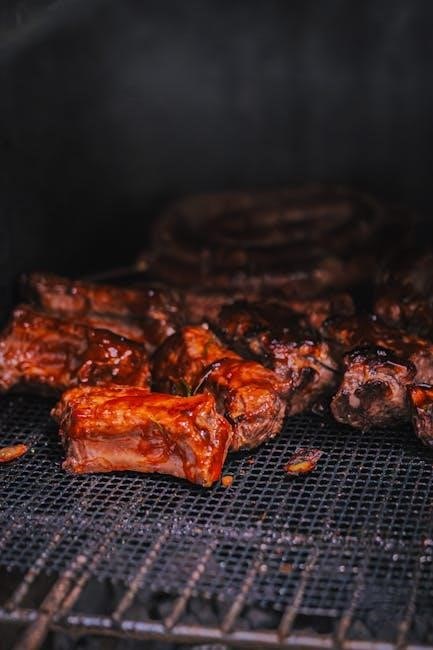
Cooking Methods for Costco Prime Rib
Explore diverse cooking techniques! The reverse sear and traditional roasting methods both yield exceptional results, offering flexibility based on your preference and available time.
Achieve perfectly cooked prime rib with detailed instructions for each approach, ensuring a tender and flavorful centerpiece for any occasion.
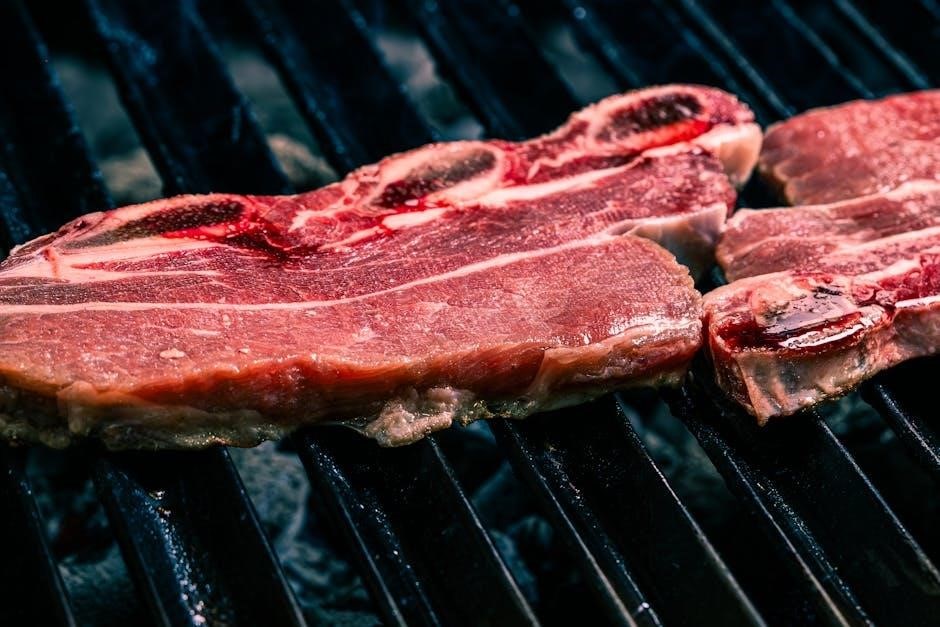
Reverse Sear Method
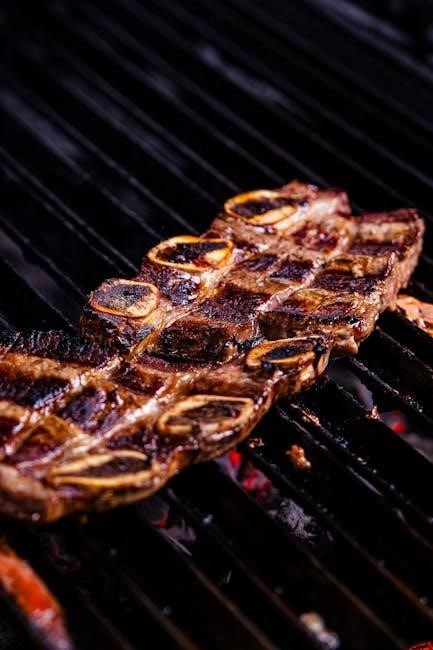
The reverse sear method is gaining popularity for its ability to cook the prime rib evenly and achieve a beautiful crust. This technique involves slowly bringing the roast up to a near-final internal temperature in the oven, then searing it at a high heat for a short period.
Begin by preheating your oven to a low temperature, typically between 225°F and 275°F. Place the seasoned prime rib on a wire rack set inside a baking sheet. This allows for even air circulation. Insert a meat thermometer into the thickest part of the roast, avoiding bone.
Cook the prime rib until it reaches an internal temperature approximately 15-20°F below your desired final temperature (e.g., 100-105°F for rare, 110-115°F for medium-rare). This can take several hours, depending on the size of the roast.
Once the target temperature is reached, remove the roast from the oven and let it rest briefly. Then, heat a cast-iron skillet or other heavy-bottomed pan over high heat with a high smoke point oil. Sear the prime rib on all sides for 1-2 minutes per side, creating a flavorful crust. Finally, rest the roast again before carving and serving.
This method ensures a consistently tender and juicy prime rib with a perfectly browned exterior.
Traditional Roasting Method
The traditional roasting method is a classic approach to cooking prime rib, delivering consistently delicious results. This involves roasting the seasoned prime rib at a moderate oven temperature for a specified time, based on its weight and desired doneness.
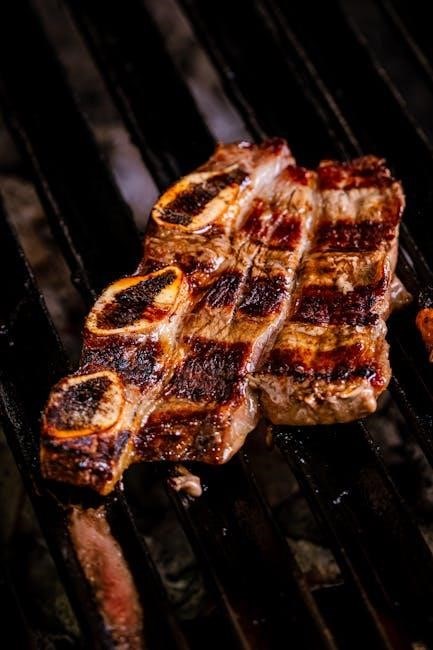
Preheat your oven to 325°F (160°C). Place the seasoned prime rib, fat cap up, on a roasting rack inside a baking pan. The rack allows for even heat circulation. Insert a reliable meat thermometer into the thickest part of the roast, ensuring it doesn’t touch bone.
Roast the prime rib, calculating cooking time based on weight and desired doneness. A general guideline is approximately 13-15 minutes per pound for rare, 15-17 minutes per pound for medium-rare, and 17-20 minutes per pound for medium.
Monitor the internal temperature closely using the meat thermometer. Remove the roast from the oven when it reaches 5-10°F below your target temperature, as it will continue to cook during resting. Let the roast rest for at least 20-30 minutes before carving, tented loosely with foil. This allows the juices to redistribute, resulting in a more tender and flavorful prime rib.
This method provides a reliable and straightforward way to achieve a beautifully roasted prime rib.
Cooking Temperatures & Times (Rare, Medium-Rare, Medium)
Achieving your desired level of doneness is crucial for a perfect prime rib. Internal temperature is the key indicator, not cooking time alone. These guidelines are approximate and depend on your oven and the roast’s specific characteristics. Always use a reliable meat thermometer for accuracy.
For Rare: Aim for an internal temperature of 120°F (49°C). Cooking time is roughly 13-15 minutes per pound at 325°F (160°C). The roast will have a bright red center and be very tender.
For Medium-Rare: Target an internal temperature of 130°F (54°C). Expect approximately 15-17 minutes per pound at 325°F (160°C). This yields a warm red center with increased flavor and tenderness.
For Medium: Aim for 140°F (60°C). Cooking time is around 17-20 minutes per pound at 325°F (160°C). The center will be pink, and the roast will be slightly firmer.
Remember to remove the roast 5-10°F before your target temperature, as carryover cooking will continue to raise the temperature during resting. Consistent monitoring with a thermometer is vital for optimal results.
These times are estimates; prioritize temperature over time.
Using a Meat Thermometer
A meat thermometer is essential for precise cooking. Insert it into the thickest part, avoiding bone. Monitor temperatures closely to ensure perfect doneness and a flavorful result!
Proper Thermometer Placement
Achieving an accurate internal temperature reading is paramount when cooking a Costco prime rib, and proper thermometer placement is key to success. Avoid touching bone with the thermometer probe, as this can provide a falsely elevated reading. Instead, insert the thermometer into the thickest part of the roast – typically the center – ensuring it penetrates at least two inches deep.
For a bone-in roast, carefully guide the probe between the bones and into the meat. Angle the thermometer so the tip is positioned in the center of the roast, away from any large pockets of fat or gristle. It’s also wise to check the temperature in multiple spots to confirm consistency throughout the roast.
Digital thermometers offer quick and precise readings, while traditional dial thermometers require a bit more patience. Regardless of the type you use, ensure the probe is clean before insertion. Remember, consistent monitoring and accurate placement are your allies in achieving a perfectly cooked, tender, and juicy Costco prime rib!
Target Internal Temperatures
Determining your desired level of doneness is crucial for a satisfying prime rib experience. Utilizing a meat thermometer is the most reliable method for achieving this. For a rare prime rib, aim for an internal temperature of 120°F (49°C). This will yield a cool, red center.
If you prefer medium-rare, remove the roast from the oven when the thermometer registers 130°F (54°C), resulting in a warm, red center. Those who enjoy a bit more doneness should target 140°F (60°C) for medium, which offers a warm, pink center.
Remember that the internal temperature will continue to rise by approximately 5-10°F during the resting period, known as “carryover cooking”. Therefore, it’s best to remove the roast slightly before reaching your target temperature. Always prioritize food safety and ensure the roast reaches a minimum internal temperature of 135°F (57°C) as per USDA guidelines.
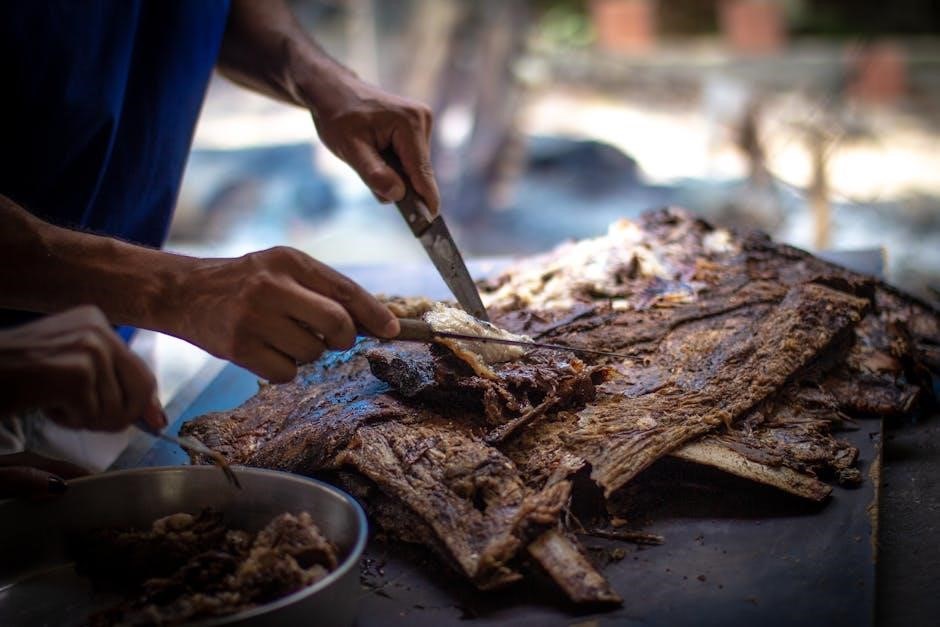
Resting the Prime Rib
Allowing the prime rib to rest is paramount! This crucial step redistributes juices, ensuring a tender and flavorful result. Patience yields a superior dining experience.
Importance of Resting
Resting the prime rib isn’t merely a suggestion; it’s a fundamental step in achieving a truly exceptional roast. Immediately after removing the roast from the oven, or finishing the sear, the internal temperature continues to rise – a phenomenon known as carryover cooking. However, more importantly, the muscle fibers are still tightly contracted from the heat.
If you were to slice into the roast immediately, all those flavorful juices would rush out, leaving you with a drier, less succulent result. Resting allows these muscle fibers to relax and reabsorb the juices, resulting in a significantly more tender and flavorful piece of meat. Think of it like letting a sponge fill with water – if you squeeze it immediately, water will spill out, but if you let it sit, it will retain more moisture.
During the resting period, the internal temperature will stabilize and even out, ensuring consistent doneness throughout the roast. This is particularly important for larger cuts like a Costco prime rib, where the center may be slightly cooler than the outer edges after cooking. A properly rested prime rib will be noticeably more tender, juicy, and flavorful than one that is cut into prematurely.
Resting Time Guidelines
Determining the appropriate resting time for your Costco prime rib is crucial for optimal results. A general rule of thumb is to rest the roast for at least 30-45 minutes, but larger roasts, like the 17-pound cuts often found at Costco, benefit from a longer rest – up to an hour or even slightly more.
The exact resting time will depend on the size of the roast and your desired level of doneness. For a smaller roast (under 10 pounds), 30 minutes may suffice. However, for larger roasts, extending the resting time to 45-60 minutes is highly recommended. Don’t worry about the roast cooling down too much during this time; it will retain plenty of heat, especially if tented loosely with foil.
Tenting the roast with foil helps to retain heat while still allowing some steam to escape, preventing the exterior from becoming soggy. Avoid wrapping the roast tightly in foil, as this can trap too much moisture and affect the texture. After the resting period, the prime rib will be ready to carve and serve, boasting maximum tenderness and juiciness.
Serving Suggestions
Elevate your Costco prime rib with classic sides like roasted potatoes, Yorkshire pudding, and creamed spinach. Consider horseradish sauce or a rich gravy to complement the beef!
Recommended Side Dishes
Complement your magnificent Costco prime rib with a selection of sides designed to enhance the overall dining experience. Classic choices consistently deliver, starting with creamy, perfectly roasted garlic mashed potatoes – a timeless pairing that never disappoints. Yorkshire pudding, with its light and airy texture, provides a delightful contrast to the richness of the beef, and is practically essential for a traditional roast dinner.
For a touch of green, consider vibrant creamed spinach, offering a subtle earthy flavor that balances the savory notes of the prime rib. Roasted Brussels sprouts, caramelized to perfection, add a slightly bitter and sweet element. Don’t overlook the simplicity of roasted root vegetables like carrots and parsnips, glazed with a touch of maple syrup or honey for added sweetness.
A crisp green salad with a light vinaigrette provides a refreshing palate cleanser between bites. Finally, for those who enjoy a bit of tang, a cranberry sauce or chutney can cut through the richness of the meat. Remember to consider your guests’ preferences when selecting the perfect accompaniments to create a truly memorable meal!
Sauces and Gravies
Elevate your Costco prime rib feast with carefully selected sauces and gravies, designed to complement its rich, savory flavor. A classic beef gravy, made from the pan drippings, is an absolute must-have, providing a luxurious coating for each slice. Enhance the gravy with a splash of red wine or a touch of Worcestershire sauce for added depth.
For those seeking a bolder flavor profile, a horseradish sauce offers a delightful kick, cutting through the richness of the beef. A creamy Béarnaise sauce, with its delicate tarragon flavor, provides an elegant and sophisticated accompaniment. Alternatively, a simple red wine reduction sauce, simmered to perfection, adds a touch of refinement.
Consider a mushroom sauce, utilizing sautéed mushrooms and a touch of cream, for an earthy and umami-rich option. Don’t underestimate the power of a simple Dijon mustard – its tangy bite can beautifully balance the flavors. Ultimately, the best sauce is the one that best suits your personal preference and enhances the overall dining experience!