MRCH2 Installation Manual: A Comprehensive Guide
Welcome! This manual guides HVAC professionals through installing and configuring the MRCH2 controller with Mitsubishi Electric indoor units, ensuring a safe and effective setup process.
The Mitsubishi MRCH2 is a cutting-edge wireless remote controller designed for seamless integration with compatible Mitsubishi Electric indoor units. Featuring a user-friendly touch panel and a backlit, easy-to-read display, the MRCH2 offers enhanced control and convenience. It utilizes the latest RedLINK™ 3.0 wireless technology, providing a reliable and robust connection within a 200-foot range – line of sight is not required!
This controller serves as the primary interface for adjusting settings like temperature and operational modes (cool, heat, dry, and fan). Importantly, the MRCH2 is not compatible with older systems employing RedLINK 2.0 or utilizing MHK1, MOS1, MCCH1, or Gateway (Rig) technologies. The MRCH2 itself is the main thermostat body, offering flexible placement options throughout the occupied space. Proper installation, as detailed in this manual, is crucial for optimal performance and user satisfaction.
Target Audience & Safety Precautions
This MRCH2 Installation Manual is specifically intended for licensed HVAC professionals possessing the necessary training and experience to safely install and configure heating, ventilation, and air conditioning systems. Attempting installation without proper qualifications could result in system malfunction, property damage, or personal injury.
Safety is paramount. Before commencing any work, always disconnect power to the indoor unit at the breaker panel. Exercise caution when handling electrical components and wiring. Adhere to all local and national electrical codes. Ensure the work area is clean and well-lit. Proper grounding is essential. Refer to the indoor unit’s service manual for additional safety guidelines. Mitsubishi Electric is not responsible for damages resulting from improper installation or failure to follow these precautions. Our team is available for support.
Understanding the MRCH2 System
The MRCH2 utilizes RedLINK 3.0 wireless technology, offering a user-friendly touch panel and backlit display for convenient control of Mitsubishi Electric indoor units.
MRCH2 Specifications & Features
The Mitsubishi Electric MRCH2 Wireless RedLINK Remote Controller is designed for seamless integration with compatible indoor units. Key specifications include a responsive touch panel interface and a clear, backlit display, enhancing usability and readability in various lighting conditions. This controller leverages the advanced RedLINK™ 3.0 wireless technology, ensuring a reliable and stable connection.
Notably, the MRCH2 is not compatible with older systems utilizing MHK1, MOS1, MCCH1, or the original RedLINK 2.0 wireless technology environment. User-programmable functions allow for customized control, including on/off operation and selection between cooling, heating, dry, and fan modes. The controller’s range extends up to 200 feet from the indoor unit, eliminating the need for direct line of sight.
Its primary function is to enable users to adjust settings like temperature and operational modes directly from the remote, providing convenient control over their indoor climate. The manufacturer part number for this unit is MRCH2.
RedLINK 3.0 Wireless Technology Explained
RedLINK 3.0 represents a significant advancement in wireless communication for HVAC systems, specifically designed for Mitsubishi Electric products like the MRCH2 controller. This technology prioritizes robust and dependable connectivity, minimizing interference and ensuring consistent control over your indoor unit. Unlike its predecessor, RedLINK 2.0, version 3.0 offers improved signal strength and stability, extending the effective range and reducing potential dropouts.
The core benefit of RedLINK 3.0 lies in its ability to establish a secure and reliable link between the MRCH2 remote and the MIFH2 receiver, facilitating seamless command transmission. This enhanced wireless protocol contributes to a more responsive and user-friendly experience. It’s crucial to note that the MRCH2 is not backwards compatible with devices utilizing older RedLINK versions.
This dedicated wireless system ensures optimal performance and avoids conflicts with other wireless networks in the environment.
Compatibility Considerations (Incompatible Models)
Important Note: The MRCH2 wireless remote controller is specifically engineered for compatibility with current Mitsubishi Electric indoor units supporting the RedLINK 3.0 wireless protocol. However, it is crucially important to understand that the MRCH2 is not compatible with older systems utilizing previous RedLINK versions or alternative wireless technologies.
Specifically, the MRCH2 cannot be used with the MHK1, MOS1, MCCH1, or any systems currently operating within a RedLINK 2.0 wireless environment. Attempting to integrate the MRCH2 with these incompatible models will result in a failure to establish a connection and functionality will be lost.
Before purchasing or installing the MRCH2, verify your existing system’s compatibility. Confirm that your indoor unit supports RedLINK 3.0 to ensure seamless integration and optimal performance. Refer to your indoor unit’s documentation or contact Mitsubishi Electric Customer Care for clarification.
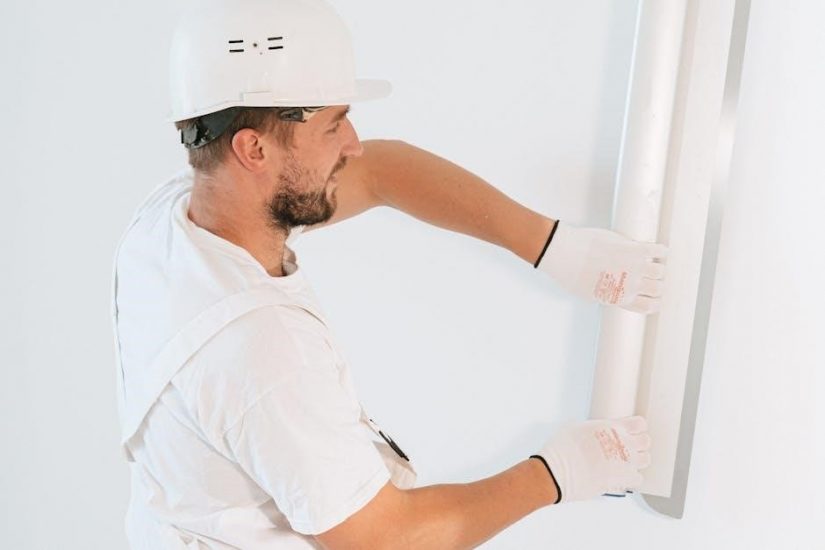
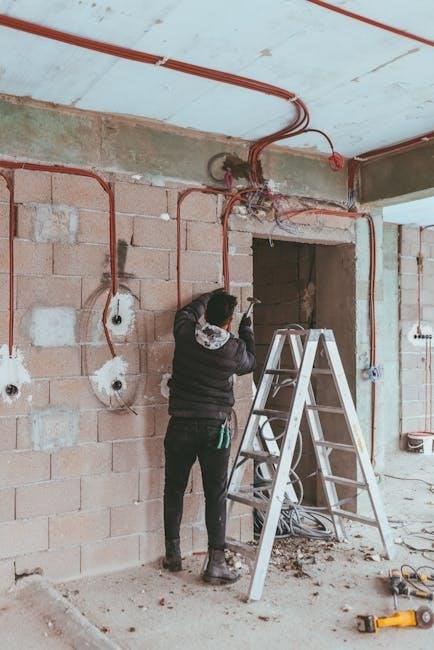
Installation Process: Step-by-Step
Begin installation by gathering the necessary tools and materials, then carefully connect the MRC2 cable to both the indoor unit (CN105) and the MIFH2 receiver.
Required Tools and Materials
Prior to commencing the MRCH2 installation, ensure you have assembled all the necessary tools and materials to facilitate a smooth and efficient process. A standard screwdriver set, including both Phillips head and flathead options, is essential for securing connections and accessing control panels. Wire strippers will be required for preparing the MRC2 cable for connection to the indoor unit and the MIFH2 receiver, ensuring clean and reliable electrical contacts.
Additionally, a multimeter is highly recommended for verifying proper voltage and continuity, confirming a stable power supply and correct wiring configurations. Depending on the installation environment, you may also need electrical tape for insulating exposed wires and cable ties for neat and organized cable management. Most importantly, the MRCH2 package itself must include the MRC2 cable for connecting the controller to the system, and the MIFH2 receiver, which is crucial for wireless communication. Confirm all components are present before starting.
Connecting the MRC2 Cable to the Indoor Unit (CN105 Connector)
Locate the CN105 connector on the indoor unit’s control board; this is the designated interface for the MRC2 cable. Carefully disconnect power to the indoor unit before proceeding to ensure safety. Gently insert the MRC2 cable connector into the CN105 port, ensuring a firm and secure connection. Avoid forcing the connector, as this could damage the pins or the control board.
Double-check the alignment of the connector to prevent any misconnections. Once connected, visually inspect the connection to confirm it is fully seated and locked into place. A loose connection can lead to communication errors or system malfunctions. After verifying the physical connection, proceed to connect the other end of the MRC2 cable to the MIFH2 receiver, following the instructions in the subsequent section. Remember to restore power to the indoor unit only after all connections are complete and verified.
Connecting the MRC2 Cable to the MIFH2 Receiver
Identify the designated port on the MIFH2 receiver for the MRC2 cable connection. Ensure the receiver is easily accessible for this connection; Carefully align the MRC2 cable connector with the receiver’s port and gently insert it until a secure connection is established. As with the indoor unit connection, avoid applying excessive force to prevent damage.
Verify the connector is fully seated and locked in place, providing a stable communication link. A properly secured connection is crucial for reliable wireless operation. Once connected, visually inspect both ends of the MRC2 cable – at the indoor unit (CN105) and the MIFH2 receiver – to confirm secure seating. After verifying both connections, you can proceed with the placement of the MRCH2 controller, keeping the 200ft range in mind.
Placement Guidelines for the MRCH2 Controller (200ft Range)
Optimal placement of the MRCH2 controller is key for reliable performance. The controller can be positioned anywhere within a 200-foot radius of the indoor unit, and importantly, does not require a direct line of sight. However, minimizing obstructions like walls and large metal objects will enhance signal strength and stability.
Avoid locating the controller in areas prone to extreme temperatures or humidity, as this could affect its functionality. Mounting the controller at a comfortable height, easily accessible for user interaction, is recommended. Ensure the chosen location allows for clear visibility of the display. Remember, while line of sight isn’t mandatory, a more open space generally yields a stronger, more consistent wireless connection. Proper placement contributes significantly to a seamless user experience.
Configuration & Setup
Initial setup involves a system check after power-up, followed by configuring user functions like on/off control and selecting desired operation modes—cool, heat, dry, or fan.
Initial Power-Up and System Check
Following the physical installation of the MRCH2 and its connections to the indoor unit and MIFH2 receiver, the initial power-up sequence is crucial for verifying correct operation. Ensure the indoor unit is energized; the MRCH2 controller, utilizing RedLINK 3.0 wireless technology, should automatically initiate pairing with the receiver.
Observe the MRCH2’s display. A successful connection will be indicated by a stable display and the absence of error messages. If the display remains blank or shows a connection error, review the wiring connections at both the indoor unit (CN105 connector) and the MIFH2 receiver. Confirm the receiver is also powered on and within the 200ft range of the controller.
A system check should then be performed to confirm basic functionality. Attempt to remotely turn the indoor unit on and off using the MRCH2. Verify that the unit responds promptly to commands. Cycle through the available operation modes (cool, heat, dry, fan) to ensure each function is correctly communicated and executed by the indoor unit. Any inconsistencies should be addressed before proceeding.
User Function Settings: On/Off Control
The MRCH2’s primary function is providing convenient on/off control of the connected Mitsubishi Electric indoor unit. The touch panel interface allows users to easily power the system on or off with a single touch. This functionality is fundamental to the controller’s operation and should be verified during initial setup.
To activate the system, simply touch the power icon on the MRCH2’s display. The indoor unit should respond within seconds, initiating its startup sequence. To deactivate, touch the same icon; the unit will begin its shutdown process. Ensure the response is immediate and reliable.
Users can set preferences for default operation. While the MRCH2 doesn’t inherently store complex schedules, the on/off control serves as the base for manual operation; Proper function of this control is essential for user satisfaction and efficient climate management. Confirm responsiveness from various locations within the 200ft range.
Operation Mode Selection (Cool, Heat, Dry, Fan)
The MRCH2 remote controller empowers users to select from four core operation modes: Cool, Heat, Dry (Dehumidification), and Fan-only. These modes cater to diverse climate control needs, offering flexibility and comfort. Accessing these modes is intuitive via the touch panel interface.
Selecting a mode involves navigating the MRCH2’s menu and choosing the desired setting. The indoor unit will then adjust its operation accordingly. ‘Cool’ lowers the temperature, ‘Heat’ raises it, ‘Dry’ reduces humidity, and ‘Fan’ circulates air without temperature adjustment.
Verify each mode functions correctly during the setup process. Ensure the indoor unit responds appropriately to each selection. Proper mode operation is crucial for optimal performance and user satisfaction. The MRCH2 allows for simple, direct control of the indoor unit’s core functions, enhancing the overall user experience.
Troubleshooting Common Issues
This section details solutions for wireless connection problems, display malfunctions, and incompatibility errors encountered during MRCH2 installation and operation, ensuring smooth performance.
Wireless Connection Problems
Experiencing difficulty establishing a stable wireless connection with your MRCH2 controller? Several factors can contribute to this issue. First, verify the distance between the MRCH2 and the indoor unit; exceeding the 200ft range can weaken the signal. Ensure there are no significant obstructions, like thick walls or large metal objects, interfering with the RedLINK 3.0 signal.
Confirm the indoor unit is powered on and functioning correctly. A weak or intermittent signal may also indicate interference from other wireless devices operating on the same frequency. Try relocating the MRCH2 slightly to optimize signal reception. If problems persist, check for incompatibility with older RedLINK 2.0 systems, MHK1, MOS1, MCCH1, or the Gateway (Rig). A system reset of both the controller and indoor unit can sometimes resolve connection issues. Finally, ensure proper cable connections between the MRC2 cable, CN105 connector, and MIFH2 receiver.
Display Issues & Backlight Functionality
If the MRCH2’s touch panel display is blank or exhibiting unusual behavior, first confirm the unit is receiving power. Check the indoor unit’s power supply and ensure the MRC2 cable is securely connected to both the CN105 connector and the MIFH2 receiver. A dim or non-functional backlight typically indicates a low battery or a system setting affecting display brightness.
The MRCH2 features a backlit, easy-to-read display designed for clear visibility. If the backlight isn’t activating, consult the user function settings within the controller’s menu. Some models may have an auto-dimming feature that adjusts brightness based on ambient light. If the touch panel is unresponsive, try a soft reset by briefly disconnecting and reconnecting the power supply. Persistent display problems may require contacting Mitsubishi Electric Customer Care for further assistance or potential replacement.
Incompatibility Errors & Solutions
The MRCH2 wireless remote controller is specifically designed for newer Mitsubishi Electric systems utilizing RedLINK 3.0 technology. It is not compatible with older models employing RedLINK 2.0, or those using MHK1, MOS1, MCCH1, or Gateway (Rig) systems. Attempting to integrate the MRCH2 with incompatible equipment will result in connection failures and error messages.
If you encounter incompatibility errors during installation, verify the indoor unit’s model number and confirm its RedLINK compatibility. Ensure no legacy RedLINK 2.0 devices are present within range, as they can interfere with the signal. If the issue persists, a complete system assessment may be necessary to determine the appropriate controller for your setup. Contacting Mitsubishi Electric Customer Care with your system details will help identify the correct solution and avoid further complications.
Support & Resources
For assistance, contact Mitsubishi Electric Customer Care via email at CustomerCarehvac.mea.com. Explore online resources for detailed information and warranty details (MRCH2).
Contacting Mitsubishi Electric Customer Care (Email)
Need expert assistance with your MRCH2 installation or have questions regarding its functionality? Mitsubishi Electric provides dedicated customer support to ensure a smooth experience. For prompt and efficient help, please reach out to our knowledgeable team via email. Simply send your inquiries to CustomerCarehvac.mea.com.
When contacting support, please include detailed information about your specific issue, including the indoor unit model number, the MRCH2’s part number (MRCH2), and a clear description of the problem you are encountering. Providing screenshots or photos of any error messages or unusual behavior can also expedite the troubleshooting process. Our team is committed to responding to your inquiries in a timely manner and providing effective solutions. We are here to support you every step of the way, from initial setup to ongoing operation.
Finding Additional Information Online
Beyond this manual, a wealth of resources is available online to support your MRCH2 installation and operation. Mitsubishi Electric’s official website offers a comprehensive library of documentation, including detailed specifications, troubleshooting guides, and frequently asked questions. Explore the site for the latest firmware updates and compatibility information.
Furthermore, numerous online forums and communities dedicated to HVAC professionals provide valuable insights and shared experiences with the MRCH2 controller. These platforms can be excellent sources for finding solutions to common challenges and learning best practices from peers. Microsoft Support also provides helpful articles and videos related to compatible technologies. Remember to always verify information from unofficial sources with official Mitsubishi Electric documentation to ensure accuracy and safety. A quick online search will reveal a multitude of resources to enhance your understanding and streamline the installation process.
Warranty Information & Manufacturer Part Number (MRCH2)
The Mitsubishi Electric MRCH2 Wireless Remote Controller is backed by a comprehensive warranty, safeguarding your investment against manufacturing defects. Specific warranty terms and conditions, including duration and coverage details, are outlined in the separate warranty document included with your purchase. Please retain this document for future reference and potential warranty claims.
For efficient processing of any warranty requests or to obtain replacement parts, it’s crucial to have the Manufacturer Part Number: MRCH2 readily available. This unique identifier ensures accurate ordering and compatibility. Mitsubishi Electric is committed to providing reliable products and exceptional customer support. Should you encounter any issues or require assistance with warranty-related inquiries, please contact Mitsubishi Electric Customer Care directly. Proper installation and adherence to the guidelines in this manual are essential for maintaining warranty validity.