
Wooden Tool Chest Plans Free PDF: A Comprehensive Guide
Discover detailed wooden tool chest plans with free PDF downloads, offering step-by-step instructions for building durable and customizable storage solutions for your tools. Perfect for all skill levels!
Welcome to our comprehensive guide on wooden tool chest plans free PDF! Building a wooden tool chest is a practical and rewarding project for woodworkers of all skill levels. With free downloadable plans, you can create a sturdy, customizable storage solution for your tools. Whether you’re a seasoned craftsman or a beginner, this guide provides everything you need to get started. Explore designs, materials, and step-by-step instructions to craft a tool chest that fits your workspace and needs. Start your project today and enjoy the satisfaction of handmade storage!
Importance of a Wooden Tool Chest
A wooden tool chest is vital for protecting and organizing your tools. It provides a durable, customizable storage solution, enhancing workspace efficiency and preserving tool quality. Handcrafted chests add a professional touch, ensuring tools are easily accessible and securely stored, making them a worthwhile investment for woodworking projects;
Why Choose Wood for Your Tool Chest
Wood is an excellent choice for tool chests due to its durability, aesthetic appeal, and ability to be customized. Unlike metal, wood offers a classic look that can be stained or painted to match your workspace. It also provides natural insulation, protecting tools from extreme temperatures. Wood is sustainable and eco-friendly, making it a popular choice for environmentally-conscious woodworkers. Additionally, wooden chests can be easily modified to fit specific needs, ensuring a perfect blend of functionality and style for years to come.
Organization and Accessibility
A well-designed wooden tool chest enhances organization and accessibility, ensuring tools are easy to find and use. Features like compartments, trays, and dividers help categorize items, reducing clutter. Handles and wheels improve mobility, allowing the chest to be moved effortlessly. Customizable layouts cater to specific tool collections, while a secure lid keeps contents safe. This thoughtful design maximizes workshop efficiency, making it a practical and essential addition for any woodworker or DIY enthusiast.
Cost-Effectiveness
Building a wooden tool chest is a cost-effective solution for tool storage. Using affordable materials like Baltic birch plywood and basic hardware reduces expenses. Free PDF plans eliminate the need for purchased designs, saving money. DIY construction avoids high costs of commercial chests, offering a budget-friendly alternative. Customization ensures you only build what you need, optimizing resources. This project is both economical and rewarding, providing long-term value for your workshop or garage.
Finding Free Woodworking Plans
Finding free woodworking plans is easy with websites like ToolCrib and Woodsmith Plans, offering detailed guides for tool chests and more.
Best Websites for Free Plans
Discover the best websites offering free woodworking plans for tool chests. ToolCrib provides detailed guides and tutorials, while Woodsmith Plans features a wide range of storage solutions. Additionally, platforms like Ana White and MyOutdoorPlans offer DIY enthusiasts easy-to-follow designs for tool chests and more. These resources ensure you find the perfect plan to suit your needs and skill level.
Choosing the Right Plan
When selecting a wooden tool chest plan, consider your skill level, tool collection, and workspace needs. Choose plans with clear instructions and material lists. Opt for designs that align with your tool organization goals, such as compartments or drawers. Ensure the plan suits your available materials and tools. For beginners, simple designs are ideal, while advanced woodworkers can explore complex joinery. Customizable plans allow you to tailor the chest to your specific needs, ensuring functionality and satisfaction.

Materials and Tools Needed
Necessary Tools include a saw, drill, sander, and measuring tape. Clamps and screwdrivers are also essential. A router can add decorative edges for a finished look.
Essential Materials
Essential materials for building a wooden tool chest include high-quality plywood or solid wood for the frame and panels. Baltic birch plywood is a popular choice for its durability and smooth finish. Additional materials include wood screws, hinges, drawer slides, and handles. Sandpaper and wood finishes like stain or paint are also necessary for protection and aesthetics. Proper hardware ensures functionality, while weather-resistant coatings can enhance longevity for outdoor use. Always choose materials that align with your design and budget needs.
Necessary Tools
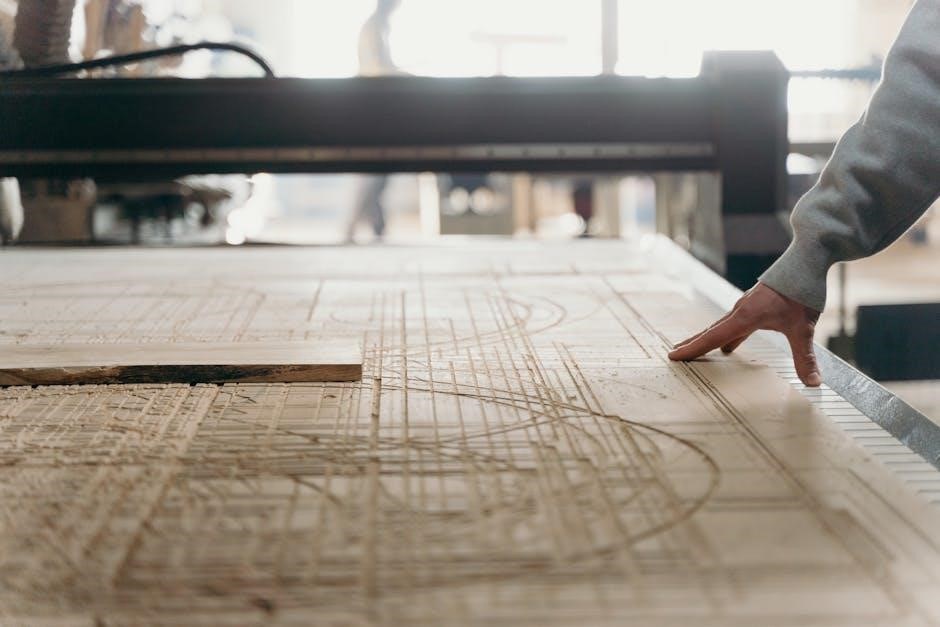
Necessary tools for building a wooden tool chest include a table saw or circular saw for cutting wood, a drill press for precise holes, and a hand saw or jigsaw for curved cuts. Sandpaper and a sander are essential for smoothing surfaces. Clamps, measuring tape, and a pencil aid in accurate assembly. A hammer, screwdrivers, and wrenches are also required. For finishing, brushes or rollers for stain or paint are needed. Safety gear like gloves and goggles should always be used to protect yourself during the process.
Step-by-Step Building Instructions
Follow detailed step-by-step plans to build a wooden tool chest, including material preparation, frame construction, assembly, and finishing touches for a professional-looking result.
Preparing Materials
Start by gathering all necessary materials, such as Baltic birch plywood or solid wood for the frame. Measure and cut the wood according to the plan specifications. Sand all pieces to ensure smooth surfaces and remove splinters. Organize hardware like hinges, drawer slides, and handles. Double-check measurements for accuracy before proceeding. Proper preparation ensures a seamless assembly process and a professional finish for your wooden tool chest.
Constructing the Frame
Begin by assembling the frame using wood glue and clamps to ensure squareness. Attach the sides and base with screws or nails, reinforcing joints for stability. Use a level to ensure the frame is even. Install supports for drawers or shelves if included in the plan. Allow the glue to dry completely before moving on to the next step. A sturdy frame is the foundation of a durable tool chest, so precision is key.
Assembling the Chest
Attach the pre-cut panels to the frame using wood screws, ensuring proper alignment. Install hinges and latches for secure lid closure. Add drawer slides and compartments for organization. Sand all surfaces for a smooth finish. Use clamps to hold parts in place while tightening. Double-check that the chest is square and all joints are secure. Consider adding a protective coating before final assembly. Follow the plan’s instructions for precise fitting and alignment to ensure durability and functionality.
Design Considerations and Customization
Enhance your tool chest’s aesthetics and functionality by incorporating custom designs, such as intricate carvings or paint finishes. Consider adding compartments, drawers, or dividers for better organization and accessibility.
Design Options
Explore various design options for your wooden tool chest, from classic to modern styles. Consider adding a sliding inner till or drawers for organization; Use Baltic birch plywood for a durable and sleek look, or opt for solid wood for a traditional feel. Customize the size and layout to fit your tool collection, ensuring functionality and personalization.
Customizing Your Chest
Personalize your wooden tool chest with finishes, compartments, and hardware to match your needs. Add a sliding inner till for small tools or drawers for larger items. Enhance durability with protective coatings or paint. Incorporate casters for mobility or a lock for security. Use Baltic birch plywood for a modern look or solid wood for a traditional feel. Customize the size and layout to perfectly organize your tools, ensuring functionality and personal style.
Safety Tips and Best Practices
Always wear protective gear like gloves and safety glasses. Ensure proper tool usage and maintain a clean workspace. Avoid overreaching and keep loose clothing tied back for safety.
Personal Protective Equipment
Wearing personal protective equipment is crucial when building a wooden tool chest. Always use safety glasses to protect your eyes from debris and ear protection when using loud power tools. Durable work gloves prevent cuts and splinters, while a dust mask helps avoid inhaling sawdust. Ensure proper footwear is worn in the workshop to prevent accidents. Regularly inspect your safety gear to ensure it remains effective. Staying safe ensures a successful and enjoyable woodworking experience while constructing your tool chest.
Safe Practices
Ensure a safe woodworking environment by maintaining a clean and clutter-free workspace. Always keep loose clothing tied back and long hair secured. Avoid wearing jewelry that could catch on tools. Use proper lifting techniques to prevent injuries. Keep children and pets away from the work area. Regularly inspect tools for damage and ensure they are used for their intended purpose. Follow all safety guidelines provided with power tools and materials. Take regular breaks to avoid fatigue and maintain focus while working on your wooden tool chest.

Finishing Touches
Add a professional finish to your tool chest with paint, stain, or protective coatings. Ensure proper drying times and consider sanding for a smooth, durable surface finish.
Painting and Staining
Enhance the appearance and durability of your wooden tool chest with a fresh coat of paint or stain. Choose a color that matches your workshop style or opt for a natural stain to showcase the wood grain. Apply a primer for better paint adhesion and finish with a clear sealant for protection. Always sand surfaces smooth before painting or staining and allow adequate drying time between coats for a professional finish.
Protective Coatings
Protect your wooden tool chest with durable coatings to shield it from moisture and wear. Apply a clear polyurethane or varnish to preserve the wood and enhance its appearance. For added protection, consider a water-resistant sealant or wax finish. These coatings not only extend the lifespan of your tool chest but also maintain its functionality and aesthetic appeal, ensuring it remains a reliable storage solution for years to come.
Advanced Projects
Elevate your woodworking skills with advanced projects like a rolling tool chest or a Dutch-style tool chest. These designs offer enhanced mobility and sophisticated storage solutions for your workshop.
Building a Rolling Tool Chest
A rolling tool chest offers unmatched mobility and convenience, ideal for workshops with limited space. Constructed using Baltic birch plywood and durable hardware, it features adjustable trays and locking casters for stability. This design allows easy customization to fit your tool collection, ensuring everything stays organized and accessible. With step-by-step plans available in free PDF guides, you can create a professional-grade rolling chest that enhances workshop efficiency and showcases your woodworking skills.
Dutch-Style Tool Chest
The Dutch-Style Tool Chest is a classic design featuring a sliding inner till and solid-wood construction, perfect for organizing tools with timeless appeal. Its compact size and traditional joinery make it ideal for those seeking a space-saving, durable solution. Ideal for both seasoned woodworkers and newcomers, this chest combines functionality with aesthetics. Built to last for generations, it’s a testament to classic woodworking techniques.
Troubleshooting Common Issues
Address alignment, warping, or hardware misalignment by ensuring proper joint assembly and material preparation. Regularly inspect for wear and tighten loose fittings to maintain stability and functionality.
Common Problems and Solutions
Warped or uneven panels can be fixed by ensuring proper clamping during glue-up. Misaligned drawers may require adjusting hinges or drawer slides. To prevent wood splitting, pre-drill screw holes. For a finishes that are uneven, sand thoroughly before applying stain or paint. Regularly inspect hardware and tighten as needed to maintain functionality. Addressing these issues early ensures your tool chest remains sturdy and functional for years to come.
This comprehensive guide provides everything needed to build a wooden tool chest. Download free PDF plans and explore additional resources for mastering woodworking projects.
Final Thoughts
Building a wooden tool chest is a rewarding project that combines functionality with craftsmanship. With free PDF plans, you can create a durable, customized storage solution for your tools. Whether you’re a beginner or an experienced woodworker, these plans offer clear guidance to help you succeed. The end result is not only a practical tool chest but also a sense of pride in creating something lasting. Explore additional resources for tips, advanced techniques, and inspiration to enhance your woodworking journey.
Further Reading and Resources
For more detailed guidance, explore websites like ToolCrib.com and Woodsmith Plans, which offer extensive free woodworking plans and tutorials. Fine Woodworking also provides expert tips and step-by-step videos. Additionally, check out classic designs like the Dutch tool chest for inspiration. These resources will help you refine your skills and explore advanced techniques, ensuring your wooden tool chest project is both functional and visually appealing. Dive into these resources for a comprehensive woodworking experience.